This is the first of two articles about making a 16th century gown, a Ärmelrock, a sleeved dress. A layer worn on top of a kirtle, the unterrock. The everyday dress for a woman of a wealthy merchant or patrician family.
While doing inventory a couple of weeks back it was obvious that I needed another gown, or rock in German. After avoiding it for a while I decided that I was going to make my new gown together with you. Taking photos of every step, even when I´m cheating and when things goes wrong. I´m not a trained seamstress, just self taught, so we learn as we go, as always.
The german 16th century rock has a waistseam, the skirt and bodice is two separate pieces sewn together. During the century the separate jacket and skirt comes into fashion. But not yet, not in the early 16th century.
This article will not include the making of a pattern. I have one made for me, that I will use. I recommend having a pattern made for you, and not buy one. They often fit nobody. This skirt is going to be quite wide but not have that many pleats at the waistline. I will probably have a plain front and place all the pleats from the sideseams and back.
You need 3,5 meter of wool for this dress, 0,5 meters of linen for lining, waxed linen thread, some extra wool for the facing and 0,5 meter of wool/brocade/velvet for the guards.
So, lets start!
We start by checking the fabric, does it have a front and a back side? Mine does not so I don´t need to think about that when I cut.
Start by cutting out the first of the front panels. Does your pattern include the seam allowance? Mine does.
And the other front panel.
I know, my hallway is a bit small...is it a good reason to buy a new apartment so that you could have room for more fabric?
The back piece is cut on the fold like this. The fold is on the right side.
And the piecing is turned like this.
Pin them together like this.
When sewing them together I use one back stitch, two running stitch, one back stitch, two running stitch...
We will fell the seam allowance in one direction so it will hold just fine.
I cut the seam allowance of the triangular piecing in half, but which one you cut doesn't matter, just not both of them! Fold the uncut one over and around the cut one and whip stitch. And I do it right away. Some people put it all together and the last thing they do is the seam allowance. Don´t do that. Its so boring to have an almost finished garment and then start all over again with the seam allowance.
Then it is time to attach the front panels to the back panel. Look at the front panel piece, the straight line is going to be at the front and the other is going to be sewn together with the back panel with the same method, one back stitch and two running stitches. And the seam allowances are going to be felled and whip stitched. Why don´t I have any pictures of this? Maybe because it is quite boring...just very long seams...
Anyhow...
I decided to leave the center front open and decorate it with guards of velvet.
Like this:
All of these lovely ladies is painted by Nicolas Neufchatel during the 1560s. He painted this type of dress often.
But I also found this type of guards on one of my favorite paintings, Portrait of a lady by Bernhard Strigel from 1510. So it was used during this period also.
If you don´t like it you can skip this part and just sew the front seams together, by the same method that we used while sewing the back and front panels together.
My strips of velvet is 10 cm wide. Place the right side of the velvet against the wrong side of the wool, like this.
The wool and velvet are back/running stitched in white linen thread. The fabric is folded here, so that I don't need to have the entire skirt in my lap. That´s why you see the green wool on top too.
Turn the velvet around and iron. The right side of the velvet is now on the right side of the wool. And the seam allowance is hidden in between the layers.
The front hem need some support to be as firm as I want it to be. So I make a prick stitch along the edge. Can you make it invisible? I´m trying too...
Then another prick stitch to attached the other side of the velvet strip to the wool.
And do the same again with the other side.
Now the skirt look like this.
I told you that I was going to be honest, to take photos of everything. And I have done so. And in this picture an error is visible, that I didn't see. I saw it when the skirt was done, how annoying is that?! The guards and the fabric underneath stretch differently, that might be what happened. And here the skirt is already shorter in the front than the rest. But I didn't see it, so we will keep on going, and I am going to try to do something about that in the end. Unfortunately we have a lots of steps left, steps that I will make before I will see this error.
In 16th century skirts the hemline is stiffened with a facing, and often they has some kind of interfacing. We are going to finish the hem with a 8 cm cut piece of wool. The hem facing is going to be made of the same fabric as the skirt. And as interfacing we are going to use a strip of linen. The facing of the hemline is to make it more stiff, to hold it out. There are more tailoring making a skirt than you might think. All of the dresses in the book Patterns of Fashion 3 has facings and often also interlinings at the skirts hemline.
I make my facing of straight pieces of wool that I bend by ironing. By doing that they will always try to get straight and make the skirt stand out in a nice way. It is not unusual, if the facing is in another colour than your skirt, that the facing is showing a bit at the bottom, as a decoration.
This is what it looks like after bending.
Place the strip on the right side of the hemline.
And sew it together with back stitch 1 cm from the edge.
When its done it looks like this. This is the outside of the skirt.
Turn around to inner side, and iron. The seam allowance is now hidden between the inner and outer side.
The hemline is now going to be prick stitched. This is to make it more firm.
Before stitching the hemline it look like this.
And after stitching.
Here you see one part prick stitched and one part not.
Put the stitches 2-4 mm from the edge.
Next step is the interfacing, a linen strip. I cut the strip just a bit smaller than the woolfacing, so 4,5 cm. I know I started with a wool strip that were 10 cm but a lot of that disappears when attaching it to the skirt, in seam allowances and infoldings.
Place the linen strip in the "pocket" created.
And turn the wool in and prick stitch.
Can you make the stitches invisible?
I can...
...and I cant.
It depend on if I have my mind on what I´m doing all the time, or if I start thinking of something else.
Its a terrible picture, but I´m done with my padded hem!
Now we are going to make a waistband, that we will pleat later. Linen is much stronger than wool so we will use a supportive strip of linen at the waistline. This will keep the wool from breaking and the dress will last longer. I place my linen strip on the right side of the fabric. I made it quite wide, 10 cm.
Pin it and and attach it with back stitch.
When this gets turned the lining will consist of two layers of wool and three of linen. A bit much maybe but it will help the pleats to be distinct and firm and to hold all the fabric in the skirt up.
After attaching it its time for a lot of ironing.
1. Open the wool and the linen seams away from each other by ironing.
2. Iron the wool seam allowance up. I did it in two steps because I though the linen seam gets more sharp this way.
3. Turn the skirt. Turn the linen to the inside.
4. And iron the waistline. Press the linen and wool together with your fingers so that you could see that the edge gets firm.
Cut away some of the linen if you think needed, I did. It turned out I had a bit to much when I was going to fold it down proper.
And again, make a prick stitch at the edge.
No need to be that careful this time, because we have a white layer on the backside.
Fold the linen in, pin it down and prick stitch.
I needed to turn the skirt back and forth while sewing, to see that the white thread wasn't visibly on the outside.
It was not but it was quite clear where the strip is anyway...
Its going to be a good base for my pleats. And the lining in the bodies will be white linen so it wont look strange with a white strip on the skirt when we put them together.
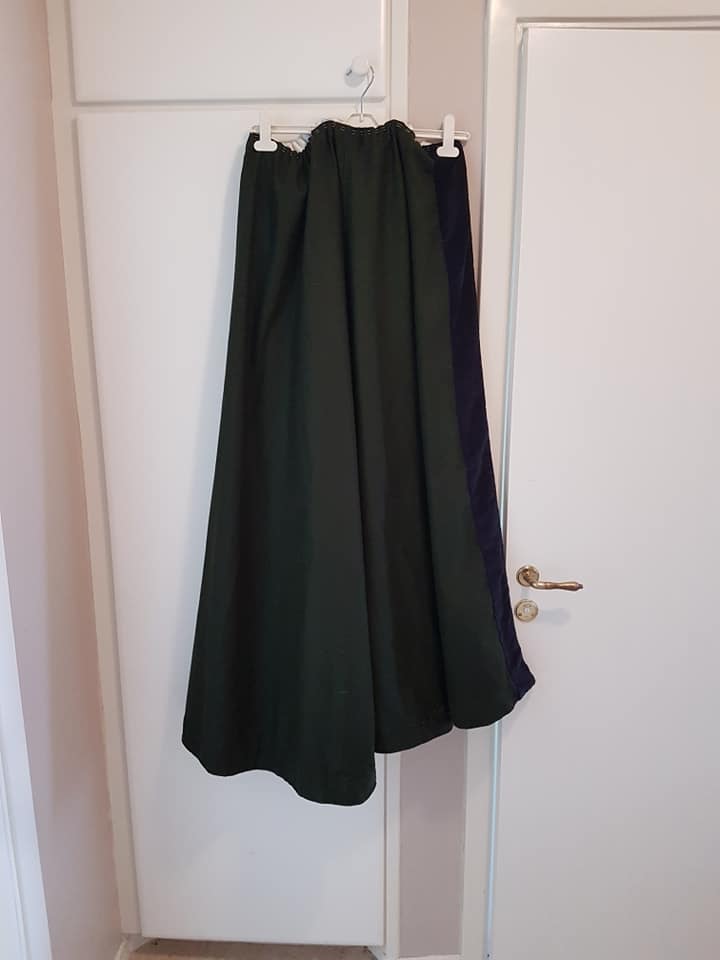
The skirt is done! I started playing around with the pleats, just to try it out.
But this is how we leave it, until we have a bodice to attach it to.
And this is when I saw it...
How much is it really? Needed to put it out on the floor to see. Its a bit wrinkly, the hemline is quite even, but the front is about 5 cm to short. So, I made a skirt with a train! Or not...I don't know. I need to eat a lot of cake, can I have it all on my bum please?
I will leave it for now, make a bodice, attach them and see how it looks. I cant say that I feel like open the hem again...but I might have to. To be continued...
What can we learn from this? Always put the parts of your pattern on top of each other, compare, are they look the way they should. Even if you have a pattern that you have used before. Do it!